This post demonstrates how to add your server vendor’s (in this case HP) VMware VIBs to VMware vSphere Update Manager. This allows you to apply drivers, patches and updates specific to your server platform directly to ESXi. You use the same workflow as you would a VMware patch: scan for updates and remediate host. Its that simple.
Many server vendors release OEM Customized Installers for ESXi5. Its a good idea to use them because they include the necessary drivers and integration for ESXi. Ever wonder why you don’t have good detection of hardware on the Host’s Hardware Status tab (View: Sensors)? Use the OEM version of ESXi and you will. For this post I use ESXi5.1 on HP DL360G5 servers.
For reference, using the URL below, you go to the VMware ESXi download site, select your ESXi version, click the Custom ISO tab and then click >OEM Installer CDs to expand the category. Select your vendor and that’s the ISO you should use when you install or upgrade ESXi.
For ESXi 5.1 the URL is:
https://my.vmware.com/web/vmware/info/slug/datacenter_cloud_infrastructure/vmware_vsphere/5_1#custom_iso
Now, on to the reason for this post. The HP VIBs are posted to the sites below.
HP VIBs Home page:
http://vibsdepot.hp.com/
Root of the HP VIBs.
http://vibsdepot.hp.com/hpq/
VIBs index used in this post for ESXi 5.1:
http://vibsdepot.hp.com/hpq/sep2013/index.xml
1) Login to vCenter. Select Home > under Solutions and Applications select Update Manager.
2) On the Configuration tab, select Download Settings. Under Download Sources, click Add Download Sources on the right.
3) Enter your Source URL and a description. In this case its http://vibsdepot.hp.com/hpq/sep2013/index.xml. Click Validate URL and when successful click OK.
a) Note: as of the date of this post, Sept 2013 is the latest VIB update for ESXi 5.1. Using the root URL above (http://vibsdepot.hp.com/hpq/) you simply select the latest date in the directory for the version of ESXi you are running. That way you only download what you need.
4) Back on the Download Settings page, click Apply. This creates the Download source.
5) Click the Download Now button to start the download. Click OK on the Download Task pop-up window.
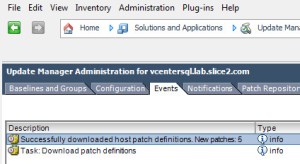
6) Select the Events tab. This is where you can see how many patches were downloaded.
7) On the patch repository page, sort by vendor and you can see the patches that were downloaded. Note that the patches are automatically added to the Critical and Non-Critical Host Patches baselines. Make sure they are attached to your Datacenter or Hosts.
8) Right-click your Cluster and select Scan for Updates. Select Patches and Extensions as well as Upgrades and click Scan to scan your hosts.
9) Since this process will update drivers and possibly the ESXi kernel (security and bug fixes), its a good idea to patch one host to verify stability. Place a Host into maintenance mode (right-click Host > Enter Maintenance Mode). When done right-click the host and select Remediate. Select Critical and Non Critical Baselines (on the right) and then complete the Wizard based on your shop’s patching practices.
10) After the host reboots and comes online in vCenter, make sure it’s functional. Verify vMotion, VMkernel Ports, Datastores, etc., check the Host’s Hardware Status tab and see if you notice that additional hardware sensors are now available. If everything is good, continue to remediate your Hosts.
As a side note, if you are in a secure location that does not allow internet access, you could download the patches and index file, stage them with HFS and and download them into Update Manager. For reference, see my HFS post for NetApp’s ONTAP upgrade here.


