• List of iSCSI Mutual CHAP Posts by OS
  • Tools and Utilities for Windows
  • Unix and Linux Distros

slice2

slice2

Tag Archives: NetBSD

HOWTO install the XFCE 4.12 Desktop on NetBSD 7

30 Saturday Jan 2016

Posted by Slice2 in NetBSD, XFCE

≈ 4 Comments

Tags

NetBSD, XFCE

This is an update to previous posts for NetBSD 6x:
http://slice2.com/2015/01/03/howto-install-the-xfce-4-desktop-on-netbsd-6-1-5/
http://slice2.com/2013/10/10/howto-install-the-xfce-4-desktop-on-netbsd-6-1-2/

For a lightweight functional desktop on NetBSD, install XFCE. As root, perform the following steps. This covers 32 and 64 bit x86 hardware. Since NetBSD essentially runs on everything, simply adjust the repository path to your architecture from the list here: http://ftp.netbsd.org/pub/pkgsrc/packages/NetBSD/

Note that your hardware support may vary. Especially for video cards. Although NetBSD runs on everything, the command line always gets the most love. Video card support can be hit or miss.

1) Setup your binary repository.
> mkdir -p /usr/pkg/etc/pkgin
> touch /usr/pkg/etc/pkgin/repositories.conf
> vi /usr/pkg/etc/pkgin/repositories.conf and add path:

For x64
http://ftp.netbsd.org/pub/pkgsrc/packages/NetBSD/amd64/7.0_2016Q1/All/

For x32
http://ftp.netbsd.org/pub/pkgsrc/packages/NetBSD/i386/7.0_2016Q1/All/

2) Add the NetBSD ftp server to your host file. This is for convenience and can be removed when done.
> vi /etc/hosts and add:
199.233.217.201 ftp.netbsd.org

3) Export your path.
Note: I don’t know why the encoded quote characters keep appearing after /ALL/ in the path statements below. It must be an html coding issue and I’m not a developer. Just make sure that at the end of the path statement it ends with /7.0_2016Q1/ALL/” with no trailing characters. In other words, it should look like the paths depicted in step 1 above only it must end in a ” character.

For x64:
> export PKG_PATH=”http://ftp.netbsd.org/pub/pkgsrc/packages/NetBSD/amd64/7.0_2016Q1/All/”

For x32:
> export PKG_PATH=”http://ftp.netbsd.org/pub/pkgsrc/packages/NetBSD/i386/7.0_2016Q1/All/”

4) Install the latest version of pkgin on your system.
> pkg_add -v pkgin-*

5) Update the pkgin database and install XFCE.
> pkgin update

> pkgin install xfce4
calculating dependencies… done.

nothing to upgrade.
121 packages to be installed (251M to download, 887M to install):

nettle-3.1.1 libtasn1-4.5 libcfg+-0.6.2nb3 gmp-6.0.0a libproxy-0.4.11 libgpg-error-1.20 libcddb-1.3.2nb1 p5-Business-ISBN-Data-20140910.002nb1 py27-cElementTree-2.7.10 libIDL-0.8.14nb4 at-spi2-core-2.16.0 icu-55.1nb1 libepoxy-1.3.1nb1 at-spi2-atk-2.16.0 ORBit2-2.14.19nb4 gobject-introspection-1.44.0 p5-Business-ISBN-2.09nb1 usbids-20081118 pciids-20150907 libvolume_id-0.81.1nb1 hal-info-20091130nb4 libcdio-0.93nb3 libgcrypt-1.6.4 glib-networking-2.36.2nb2 readline-6.3nb3 popt-1.16nb1 mit-krb5-1.10.7nb7 libiconv-1.14nb2 gnutls-3.3.18 gettext-lib-0.19.4 jbigkit-2.1 fribidi-0.19.7 enca-1.15 libogg-1.3.2 libidn-1.32 xvidcore-1.3.3 x264-devel-20150717 libvpx-1.4.0nb1 libtheora-1.1.1nb2 libass-0.12.2 lame-3.99.5nb3 tiff-4.0.6 lcms2-2.7 poppler-0.34.0 samba-3.6.25nb2 libsoup-2.50.0 libgnome-keyring-3.12.0 libcdio-paranoia-0.93nb1 hal-0.5.14nb16 p5-URI-1.69 xcb-util-0.4.0 libvorbis-1.3.5 libltdl-2.4.2 gstreamer0.10-0.10.36nb8 GConf-2.32.4nb10 iso-codes-3.61 gtk3+-3.16.6nb1 xmlcatmgr-2.2nb1 perl-5.22.0 pcre-8.38 libelf-0.8.13nb1 lzo-2.09 harfbuzz-1.0.3 cairo-gobject-1.14.2nb1 libffi-3.2.1 libxml2-2.9.2nb3 gnome-icon-theme-3.12.0 shared-mime-info-1.4 python27-2.7.10 py27-expat-2.7.10 pango-1.37.1 cairo-1.14.2nb1 atk-2.16.0 gtksourceview2-2.10.5nb24 glib2-2.44.1nb1 policykit-0.9nb18 xfce4-garcon-0.5.0 xfce4-conf-4.12.0nb2 libxklavier-5.0nb5 libglade-2.6.4nb22 libcanberra-0.27nb5 vte-0.28.1nb16 startup-notification-0.12nb3 xfce4-exo-0.10.6 libxfce4util-4.12.1nb1 libnotify-0.7.6nb2 libexif-0.6.21 gvfs-1.6.7nb17 poppler-glib-0.34.0 png-1.6.20 openjpeg-2.1.0 libgsf-1.14.34 jpeg-9anb1 gdk-pixbuf2-2.30.8nb1 ffmpegthumbnailer-2.0.8nb4 ffmpeg1-1.2.12nb1 dbus-glib-0.104 dbus-1.10.0nb1 curl-7.44.0 libxfce4ui-4.12.1nb2 libwnck-2.30.6nb18 hicolor-icon-theme-0.13 desktop-file-utils-0.22 xfce4-xarchiver-0.5.4nb1 xfce4-wm-themes-4.10.0nb1 xfce4-wm-4.12.3 xfce4-tumbler-0.1.31nb3 xfce4-thunar-1.6.10nb1 xfce4-terminal-0.6.3nb1 xfce4-settings-4.12.0nb1 xfce4-session-4.12.1 xfce4-panel-4.12.0nb1 xfce4-orage-4.12.1 xfce4-mousepad-0.4.0nb1 xfce4-gtk2-engine-3.2.0nb1 xfce4-desktop-4.12.3 xfce4-appfinder-4.12.0nb1 gtk2+-2.24.28 elementary-xfce-icon-theme-0.6 xfce4-4.12.0nb2

proceed ? [Y/n] Y

6) Add fonts, fam, screen lock and file manager.
> pkgin install font-adobe-75*
> pkgin install font-adobe-100*
> pkgin install font-adobe-utopia*
> pkgin install xscreensaver
> pkgin install fam
> pkgin install tbd (dependency of thunar)
> pkgin install gvfs (dependency of thunar)
> pkgin install xfce4-thunar

> cp /usr/pkg/share/examples/rc.d/famd /etc/rc.d/
> cp /usr/pkg/share/examples/rc.d/dbus /etc/rc.d/
> cp /usr/pkg/share/examples/rc.d/hal /etc/rc.d/

> echo rpcbind=YES >> /etc/rc.conf
> echo famd=YES >> /etc/rc.conf
> echo dbus=YES >> /etc/rc.conf
> echo hal=YES >> /etc/rc.conf

> /etc/rc.d/rpcbind start
> /etc/rc.d/famd start
> /etc/rc.d/dbus start
> /etc/rc.d/hal start

7) Configure X and start the desktop for the first time. Note that you should not start X as root. Run the following for users on the system. For example, the user slice2 would be setup as:
> echo xfce4-session >> /home/slice2/.xinitrc
> ln /home/slice2/.xinitrc /home/slice2/.xsession
> su – slice2
> startx   (note: be patient, it may take a minute to load)
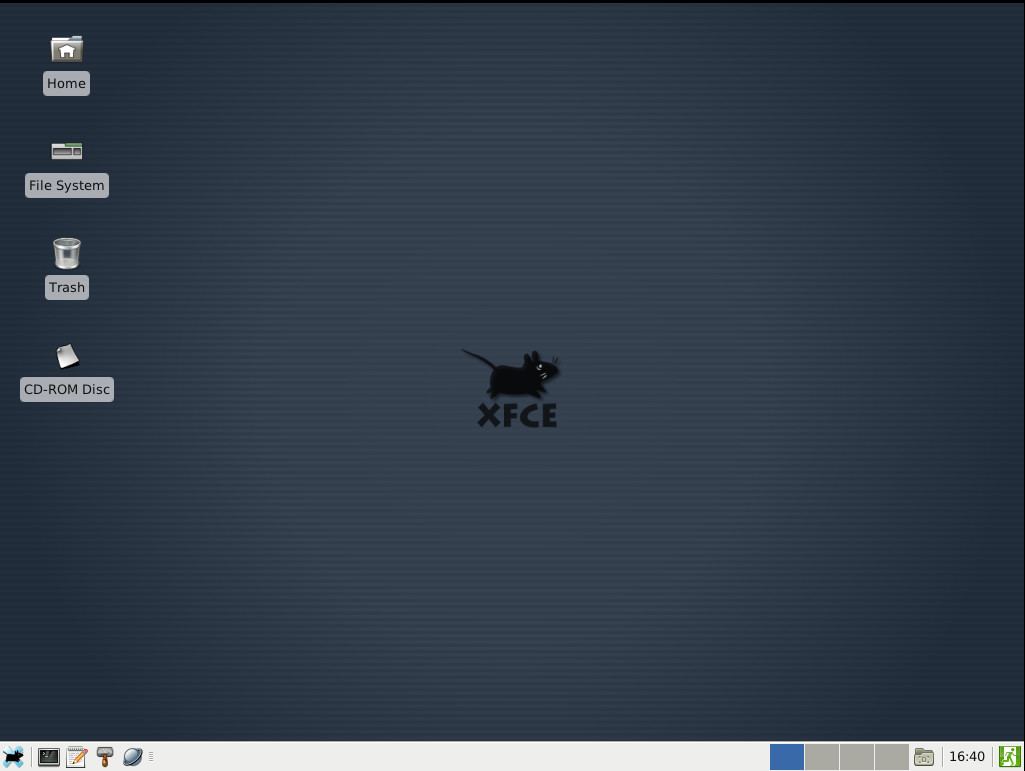
a) When prompted, select use default config. In the upper left, select Applications > Log out.

8) Install apps as desired. This step is optional. Enter Y when asked to proceed ? [Y/n] for each app.
Browsers and plugins:
> pkgin install firefox
> pkgin install opera
> pkgin install xpdf
> pkgin install flashplayer
> pkgin install openquicktime
> pkgin install mozilla-fonts*
> pkgin install icedtea-web
a) when done installing icedtea-web, run the three commands below to configure avahi.
> cp /usr/pkg/share/examples/rc.d/avahidaemon /etc/rc.d/avahidaemon
> chmod 0755 /etc/rc.d/avahidaemon
> echo avahidaemon=YES >> /etc/rc.conf

Install security apps, utils and shells:
> pkgin install wireshark
> pkgin install nmap
> pkgin install iftop
> pkgin install keepassx
> pkgin install bash
> pkgin install lsof
> pkgin install mhash
> pkgin install nbtscan
> pkgin install netcat
> pkgin install vim

GUI ftp/scp client:
> pkgin install filezilla

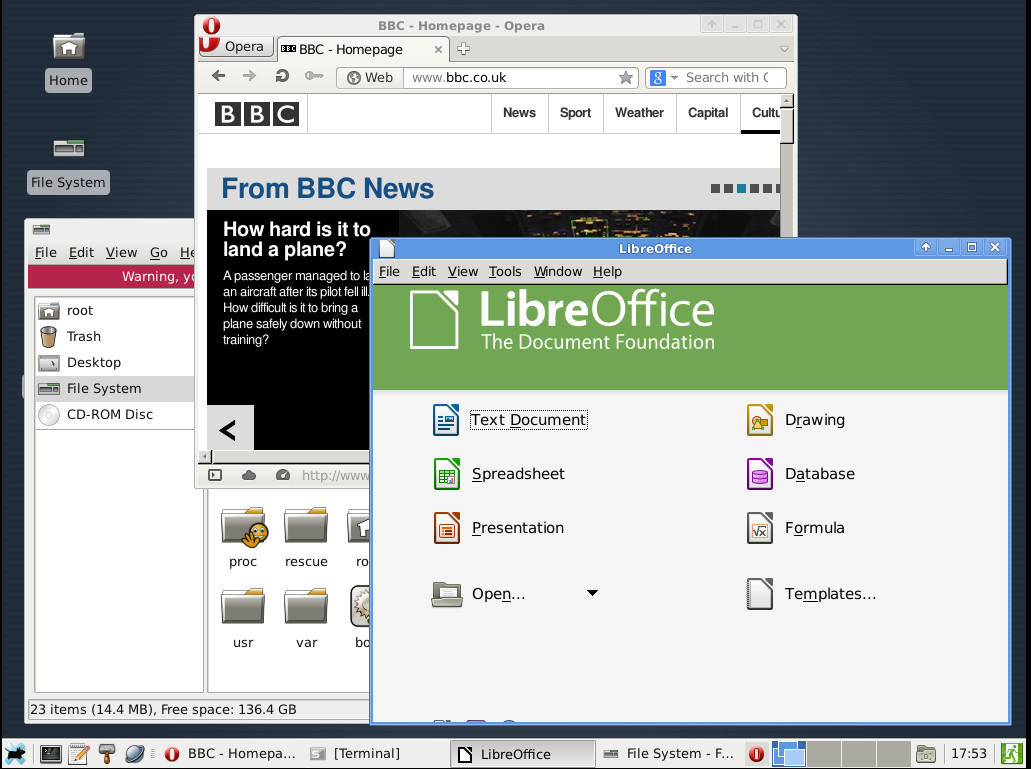
Office Suite and multimedia:
> pkgin install libreoffice*
> pkgin install xmms
> pkgin install xfce4-xmms-plugin
> pkgin install xcdroast
> pkgin install xcalc
> pkgin install vlc
> pkgin install tree

You can launch liberoffice from Applications > Office, or enter the soffice command in an xterm.

9) Now that all your apps are installed, start your desktop.
> su – slice2 (su to your user account)
> startx

HOWTO install the XFCE 4 Desktop on NetBSD 6.1.5

03 Saturday Jan 2015

Posted by Slice2 in NetBSD

≈ Leave a comment

Tags

NetBSD, XFCE

For NetBSD7 see:

http://slice2.com/2016/01/30/howto-install-the-xfce-4-12-desktop-on-netbsd-7/

This is an update to a previous post here: http://slice2.com/2013/10/10/howto-install-the-xfce-4-desktop-on-netbsd-6-1-2/

For a lightweight functional desktop, install XFCE. As root perform the following steps. This covers 32 and 64 bit x86 hardware. Since NetBSD essentially runs on everything, simply adjust the repository path to your architecture from the list here: http://ftp.netbsd.org/pub/pkgsrc/packages/NetBSD/

1) Setup your binary repository.
> mkdir -p /usr/pkg/etc/pkgin
> touch /usr/pkg/etc/pkgin/repositories.conf
> vi /usr/pkg/etc/pkgin/repositories.conf and add path:

For x64
http://ftp.netbsd.org/pub/pkgsrc/packages/NetBSD/amd64/6.1.5/All/

For x32
http://ftp.netbsd.org/pub/pkgsrc/packages/NetBSD/i386/6.1.5/All/

2) Add the NetBSD ftp server to your host file. This is for convenience and can be removed when done.
> vi /etc/hosts and add:
199.233.217.249 ftp.netbsd.org
> wq!

3) Export your path.
Note: I don’t know why the encoded quote characters keep appearing after /ALL/ in the path statements below. It must be an html coding issue and I’m not a developer. Just make sure that at the end of the path statement it ends with /6.1.5/ALL/” with no trailing characters. In other words, it should look like the paths depicted in step 1 above only it must end in a ” character.

For x64:
> export PKG_PATH=”http://ftp.netbsd.org/pub/pkgsrc/packages/NetBSD/amd64/6.1.5/All/”

For x32:
> export PKG_PATH=”http://ftp.netbsd.org/pub/pkgsrc/packages/NetBSD/i386/6.1.5/All/”

4) Install the latest version of pkgin on your system.
> pkg_add -v pkgin-*

5) Update the pkgin database and install XFCE.
> pkgin update
Database needs to be updated.
proceed ? [Y/n] y

> pkgin install xfce4
calculating dependencies… done.

nothing to upgrade.
89 packages to be installed: pkg-config-0.28 p5-Business-ISBN-Data-20120719.001nb2 icu-53.1 jbigkit-2.1 py27-cElementTree-2.7.8 libIDL-0.8.14nb4 p5-Business-ISBN-2.07nb1 p5-ExtUtils-PkgConfig-1.13nb3 p5-ExtUtils-Depends-0.304nb3 xcb-util-0.3.9nb1 p5-glib2-1.304nb1 usbids-20081118 policykit-0.9nb16pciids-20091229 libvolume_id-0.81.1nb1 hal-info-20091130nb3 p5-URI-1.64 ORBit2-2.14.19nb4 iso-codes-3.11.1nb1 psutils-1.17nb5 pixman-0.32.6 lzo-2.08xmlcatmgr-2.2nb1 orc-0.4.18 gstreamer0.10-0.10.36nb7 gobject-introspection-1.40.0 tiff-4.0.3nb6 harfbuzz-0.9.35 cairo-gobject-1.12.16nb1 perl-5.20.0nb2libffi-3.0.13 libelf-0.8.13nb1 shared-mime-info-1.3 python27-2.7.8nb1 py27-expat-2.7.8 pango-1.36.6 libXft-2.3.2 gdk-pixbuf2-2.30.3 fontconfig-2.11.1nb1 atk-2.12.0 libxfce4menu-4.6.1nb18 gst-plugins0.10-base-0.10.36nb8 libxml2-2.9.2nb1 cairo-1.12.16nb4 a2ps-4.14nb7 libxklavier-5.0nb5 libnotify-0.7.6nb1 vte-0.28.1nb15 png-1.6.13 pcre-8.36nb1 libexif-0.6.21 jpeg-9anb1 fam-2.7.0nb9 GConf-2.32.4nb9 p5-XML-Parser-2.41nb3 xfce4-exo-0.3.101nb26 hal-0.5.14nb13 xfconf-4.6.1nb22 startup-notification-0.12nb3 libxfce4util-4.6.1nb17 libwnck-2.30.6nb17 libglade-2.6.4nb21 hicolor-icon-theme-0.13 dbus-glib-0.102 dbus-1.8.8 libxfce4gui-4.6.1nb21 desktop-file-utils-0.22 xfce4-xarchiver-0.5.2nb22 xfce4-wm-themes-4.6.0nb17 xfce4-wm-4.6.1nb21 xfce4-volman-0.2.0nb25 xfce4-utils-4.6.1nb23 xfce4-thunar-1.0.1nb23 xfce4-terminal-0.4.2nb21 xfce4-settings-4.6.5nb23 xfce4-session-4.6.1nb21 xfce4-print-4.6.1nb25 xfce4-panel-4.6.2nb22 xfce4-orage-4.6.1nb23 xfce4-mousepad-0.2.16nb20 xfce4-mixer-4.6.1nb21 xfce4-icon-theme-4.4.3nb18 xfce4-gtk2-engine-2.6.0nb19 xfce4-desktop-4.6.1nb23 xfce4-appfinder-4.6.1nb23 gtk2+-2.24.22nb5 gnome-icon-theme-3.10.0nb1 glib2-2.40.0 xfce4-4.6.1nb32 (153M to download, 500M to install)

proceed ? [Y/n] Y

6) Add the font packages and screen lock.
> pkgin install font-adobe-75*
> pkgin install font-adobe-100*
> pkgin install xscreensaver

7) Configure the system to run XFCE.
> cp /usr/pkg/share/examples/xfce4/autostart/xfconf-migration-4.6.desktop /usr/pkg/etc/xdg/autostart/xfconf-migration-4.6.desktop
> chmod 0644 /usr/pkg/etc/xdg/autostart/xfconf-migration-4.6.desktop
> cp /usr/pkg/share/examples/xfce4/autostart/xfce4-settings-helper-autostart.desktop /usr/pkg/etc/xdg/autostart/xfce4-settings-helper-autostart.desktop
> chmod 0644 /usr/pkg/etc/xdg/autostart/xfce4-settings-helper-autostart.desktop

> cp /usr/pkg/share/examples/rc.d/famd /etc/rc.d/
> cp /usr/pkg/share/examples/rc.d/dbus /etc/rc.d/
> cp /usr/pkg/share/examples/rc.d/hal /etc/rc.d/

> echo rpcbind=YES >> /etc/rc.conf
> echo famd=YES >> /etc/rc.conf
> echo dbus=YES >> /etc/rc.conf
> echo hal=YES >> /etc/rc.conf

> /etc/rc.d/rpcbind start
> /etc/rc.d/famd onestart
> /etc/rc.d/dbus start
> /etc/rc.d/hal start

8) Configure X and start the desktop.
> echo xfce4-session >> /root/.xinitrc
> startx   (note: be patient, it may take a minute to load)

9) Close XFCE to prepare for installation of software.
a) Click on the mouse icon in the lower left corner and click Log out.
b) Click Log Out to exit XFCE.

10) Install apps as desired. This step is optional. Enter Y when asked to proceed ? [Y/n] for each app.
Browsers and plugins:
> pkgin install firefox*
> pkgin install opera
> pkgin install icedtea-web  (when done installing, run the next two command to configure avahi)
cp /usr/pkg/share/examples/rc.d/avahidaemon /etc/rc.d/avahidaemon
chmod 0755 /etc/rc.d/avahidaemon
> pkgin install xpdf
> pkgin install flashplayer
> pkgin install openquicktime
> pkgin install mozilla-fonts*

Security tools and shells:
> pkgin install wireshark
> pkgin install nmap
> pkgin install iftop
> pkgin install keepassx
> pkgin install bash

GUI ftp/scp client:
> pkgin install filezilla

Office Suite:
> pkgin install libreoffice4*

Notes:
To launch liberoffice, enter the soffice command in an xterm.
The list of all apps available for v6.1.5 are listed here:
http://ftp.netbsd.org/pub/pkgsrc/packages/NetBSD/amd64/6.1.5/All/

10) Now that your apps are installed, start your desktop.
> startx

HOWTO install the XFCE 4 Desktop on NetBSD 6.1.2

10 Thursday Oct 2013

Posted by Slice2 in NetBSD, XFCE

≈ Leave a comment

Tags

NetBSD, XFCE

Note: An update is posted here for NetBSD 6.1.5: http://slice2.com/2015/01/03/howto-install-the-xfce-4-desktop-on-netbsd-6-1-5/

For a lightweight functional desktop, install XFCE 4. As root perform the steps below. This HOWTO covers 32 and 64 bit x86 hardware. Since NetBSD essentially runs on everything, simply adjust the repository path to your architecture from the list here: http://ftp.netbsd.org/pub/pkgsrc/packages/NetBSD/

1) Setup your binary repository.
> mkdir -p /usr/pkg/etc/pkgin
> touch /usr/pkg/etc/pkgin/repositories.conf
> vi /usr/pkg/etc/pkgin/repositories.conf and add your binary path:

For x64
http://ftp.netbsd.org/pub/pkgsrc/packages/NetBSD/amd64/6.1.2/All/

For x32
http://ftp.netbsd.org/pub/pkgsrc/packages/NetBSD/i386/6.1.2/All/

2) Add the NetBSD ftp server to your host file. This is for convenience and can be removed when done.
> vi /etc/hosts and add:
199.233.217.249 ftp.netbsd.org
> wq!

3) Export your path.
Note: I don’t know why the characters keep appearing after /ALL/ in the path statements below. It must be a WordPress bug and I’m not a developer. Just make sure that the end of the path statement ends with /6.1.2/ALL/” with no trailing characters. In other words, it should look like the paths depicted in step 1 above only it must end in a ” character.

For x64:
> export PKG_PATH=”http://ftp.netbsd.org/pub/pkgsrc/packages/NetBSD/amd64/6.1.2/All/”

For x32:
> export PKG_PATH=”http://ftp.netbsd.org/pub/pkgsrc/packages/NetBSD/i386/6.1.2/All/”

4) Install pkgin on your system.
> pkg_add -v pkgin-*
proceed ? [Y/n] Y

5) Update the pkgin database and install XFCE.
> pkgin update
Database needs to be updated.
proceed ? [Y/n] Y

> pkgin install xfce4
calculating dependencies… done.

4 packages to be upgraded: gtk2+-2.24.17nb5 pango-1.34.1nb3 tiff-4.0.3nb3 cairo-gobject-1.12.14nb4

67 packages to be installed: pkg-config-0.28 p5-Business-ISBN-Data-20120719.001nb1 jbigkit-2.0 py27-cElementTree-2.7.5 libIDL-0.8.14nb4 p5-Business-ISBN-2.06 p5-ExtUtils-PkgConfig-1.13nb2 p5-ExtUtils-Depends-0.304nb2 tiff-4.0.3nb6 cairo-gobject-1.12.16 xcb-util-0.3.9nb1 p5-glib2-1.262nb3 usbids-20081118 policykit-0.9nb15 pciids-20091229 libvolume_id-0.81.1 hal-info-20091130nb2 p5-URI-1.60nb2 ORBit2-2.14.19nb4 iso-codes-3.11.1 psutils-1.17nb4 orc-0.4.18 gstreamer0.10-0.10.36nb6 gobject-introspection-1.36.0nb3 pango-1.34.1nb4 libxfce4menu-4.6.1nb16 gst-plugins0.10-base-0.10.36nb7 a2ps-4.14nb4 libxklavier-5.0nb5 libnotify-0.7.5nb1 vte-0.28.1nb12 libexif-0.6.21 fam-2.7.0nb9 GConf-2.32.4nb7 p5-XML-Parser-2.41nb2 xfce4-exo-0.3.101nb23 hal-0.5.14nb12 xfconf-4.6.1nb20 startup-notification-0.12nb3 libxfce4util-4.6.1nb16 libwnck-2.30.6nb15 libglade-2.6.4nb19 hicolor-icon-theme-0.12 dbus-glib-0.100.2 dbus-1.6.14 libxfce4gui-4.6.1nb19 gtk2+-2.24.20nb1 xfce4-xarchiver-0.5.2nb20 xfce4-wm-themes-4.6.0nb16 xfce4-wm-4.6.1nb19 xfce4-volman-0.2.0nb23 xfce4-utils-4.6.1nb20 xfce4-thunar-1.0.1nb21 xfce4-terminal-0.4.2nb19 xfce4-settings-4.6.5nb21 xfce4-session-4.6.1nb19 xfce4-print-4.6.1nb21 xfce4-panel-4.6.2nb20 xfce4-orage-4.6.1nb21 xfce4-mousepad-0.2.16nb18 xfce4-mixer-4.6.1nb19 xfce4-icon-theme-4.4.3nb16 xfce4-gtk2-engine-2.6.0nb17 xfce4-desktop-4.6.1nb21 xfce4-appfinder-4.6.1nb21 gnome-icon-theme-2.30.3nb20 xfce4-4.6.1nb27 (73M to download, 160M to install)

proceed ? [Y/n] Y

6) Configure the system to run XFCE.
> cp /usr/pkg/share/examples/rc.d/famd /etc/rc.d/
> cp /usr/pkg/share/examples/rc.d/dbus /etc/rc.d/
> cp /usr/pkg/share/examples/rc.d/hal /etc/rc.d/
> echo rpcbind=YES >> /etc/rc.conf
> echo famd=YES >> /etc/rc.conf
> echo dbus=YES >> /etc/rc.conf
> echo hal=YES >> /etc/rc.conf
> /etc/rc.d/rpcbind start
> /etc/rc.d/famd onestart
> /etc/rc.d/dbus start
> /etc/rc.d/hal start

7) Configure X and start the desktop.
> echo xfce4-session >> /root/.xinitrc
> startx   (note: be patient, it may take a minute to load)

xfce-01

8) Close XFCE to prepare for installation of software.
a) Click on the mouse icon in the lower left corner of the desktop and click Log Out.

xfce-02

b) Click Log Out to exit XFCE.

xfce-03

9) Install apps as desired. This step is optional but I’m sure you want at least a current browser. Enter Y when asked proceed ? [Y/n] for each app.
Browsers and plugins:
> pkgin install firefox
> pkgin install opera
> pkgin install icedtea-web
> pkgin install xpdf
Security tools:
> pkgin install wireshark
> pkgin install nmap
> pkgin install iftop
GUI ftp/scp client:
> pkgin install filezilla
Office Suite:
> pkgin install libreoffice*

Notes:
To launch firefox, enter the firefox command in an xterm.
To launch liberoffice, enter the soffice command in an xterm.
The list of all apps for NetBSD v6.1.2 are listed here:
http://ftp.netbsd.org/pub/pkgsrc/packages/NetBSD/amd64/6.1.2/All/

9) Now that your apps are installed, start your desktop.
> startx

xfce-04

NetBSD 6.1.2 released

09 Wednesday Oct 2013

Posted by Slice2 in NetBSD

≈ Leave a comment

Tags

NetBSD

This is a security/bugfix update of the NetBSD 6.1 release branch.

Details here:

http://www.netbsd.org/releases/formal-6/NetBSD-6.1.2.html

Download mirrors:

http://www.netbsd.org/mirrors/#http

HOWTO find a NetBSD iSCSI Initiator Name (iqn) with Wireshark

19 Thursday Sep 2013

Posted by Slice2 in NetBSD, Wireshark

≈ Leave a comment

Tags

NetBSD, Wireshark

The BSD variants make it difficult to quickly determine your iSCSI initiator name or iqn but I’m told they are working on a solution. While sniffing packets is an effective method of discovery, it’s simply far to cumbersome in a busy IT shop. If you know of an easier way to display the initiator please add a comment below and I’ll post it. This post is a followup to my previous list of ways to display initiators on various platforms. I have not tested this with the other BSD variants but assume the packets would be the same.

1) Install Wireshark on the NetBSD server.

> pkg_add wireshark

2) Make sure iscsi is started on the NetBSD server.

> iscsid

3) Add your storage array (your target that will present the lun)

> iscsictl add_send_target -a 10.10.10.11

Added Send Target 1

4) Refresh your target list.

> iscsictl refresh_targets

OK

5) List your targets.

> iscsictl list_targets

1: iqn.1992-08.com.netapp:sn.84167939

2: 10.10.10.11:3260,1000

6) Launch Wireshark. 

> wireshark

6a) In the Wireshark GUI, click Capture > Start to initiate packet sniffing.

8) Login to the target. In this case we’ll use target 2.

> iscsictl login -P 2

Created Session 2, Connection 1

9) List your iscsi session with your target (storage array).

> iscsictl list_sessions

Session 2: Target iqn.1992-08.com.netapp:sn.84167939

10) Stop the packet sniffing.

a) Click on Capture > Stop.

Note: click image to enlarge. The next two steps are depicted in this image.

iscsiwireshark

b) In the upper left, in the Filter: field enter “iscsi.isid” without the quotes and on the right click Apply.

11) Select the first packet from your server. In the middle expand iSCSI (Login Command), and then expand Key/Value Pairs. The first entry should list the InitiatorName= value. That is your iSCSI initiator or host iqn. In this case it’s iqn.1994-04.org.netbsd:iscsi.nbsd611.lab.slice2.com.

NetBSD 6.1 Released

21 Tuesday May 2013

Posted by Slice2 in NetBSD

≈ Leave a comment

Tags

NetBSD

Details here:

http://www.netbsd.org/releases/formal-6/NetBSD-6.1.html

Downloads here:

http://www.netbsd.org/mirrors/#http

A Quick Snort on NetBSD 6.0.1 HOWTO

26 Tuesday Mar 2013

Posted by Slice2 in NetBSD, Security

≈ Leave a comment

Tags

NetBSD, Security

Yes, I know this is a default config but if you are new to Snort it gets you up and running quickly so you can actually tinker with a running system. If you haven’t installed pkgin, see my post How to install XFCE on NetBSD 6 and run the steps to install pkgin.

1) Get the software.
> pkgin avail | grep snort

oinkmaster-2.0nb1    Manage snort rule updates
snort-2.8.5.1nb2     The Open Source Network Intrusion Detection System
snort-rules-2.4      Network Intrusion Detection System (Community Rules)
snortsnarf-20050314.1nb1 Generate HTML report summaries from snort incident alerts

> pkgin install oinkmaster-2.0nb1
> pkgin install snort-2.8.5.1nb2
> pkgin install snort-rules-2.4
> pkgin install snortsnarf-20050314.1nb1
> pkgin install libpcap
> pkgin install tcpdump
> pkgin install pcre-*

2) Create var RULE_PATH files in /usr/pkg/share/snort/rules.
> touch /usr/pkg/share/snort/rules/local.rules
> touch /usr/pkg/share/snort/rules/bad-traffic.rules
> touch /usr/pkg/share/snort/rules/exploit.rules
> touch /usr/pkg/share/snort/rules/scan.rules
> touch /usr/pkg/share/snort/rules/finger.rules
> touch /usr/pkg/share/snort/rules/ftp.rules
> touch /usr/pkg/share/snort/rules/telnet.rules
> touch /usr/pkg/share/snort/rules/rpc.rules
> touch /usr/pkg/share/snort/rules/rservices.rules
> touch /usr/pkg/share/snort/rules/dos.rules
> touch /usr/pkg/share/snort/rules/ddos.rules
> touch /usr/pkg/share/snort/rules/dns.rules
> touch /usr/pkg/share/snort/rules/tftp.rules
> touch /usr/pkg/share/snort/rules/web-cgi.rules
> touch /usr/pkg/share/snort/rules/web-coldfusion.rules
> touch /usr/pkg/share/snort/rules/web-iis.rules
> touch /usr/pkg/share/snort/rules/web-frontpage.rules
> touch /usr/pkg/share/snort/rules/web-misc.rules
> touch /usr/pkg/share/snort/rules/web-client.rules
> touch /usr/pkg/share/snort/rules/web-php.rules
> touch /usr/pkg/share/snort/rules/sql.rules
> touch /usr/pkg/share/snort/rules/x11.rules
> touch /usr/pkg/share/snort/rules/icmp.rules
> touch /usr/pkg/share/snort/rules/netbios.rules
> touch /usr/pkg/share/snort/rules/misc.rules
> touch /usr/pkg/share/snort/rules/attack-responses.rules
> touch /usr/pkg/share/snort/rules/oracle.rules
> touch /usr/pkg/share/snort/rules/mysql.rules
> touch /usr/pkg/share/snort/rules/snmp.rules
> touch /usr/pkg/share/snort/rules/smtp.rules
> touch /usr/pkg/share/snort/rules/imap.rules
> touch /usr/pkg/share/snort/rules/pop2.rules
> touch /usr/pkg/share/snort/rules/pop3.rules
> touch /usr/pkg/share/snort/rules/nntp.rules
> touch /usr/pkg/share/snort/rules/other-ids.rules

3) Test config.
> /usr/pkg/bin/snort -T -i wm0 -u snort -g snort -c /usr/pkg/etc/snort/snort.conf

4) Start Snort.
> /usr/pkg/bin/snort -D -i wm0 -A fast -b -d -u snort -g snort -c /usr/pkg/etc/snort/snort.conf -l /var/log/snort

5) Monitor hits.
> tail -f /var/log/snort/alert

6) After an hour or so, run snortsnarf.pl to get an html report.
> mkdir -p /var/log/snort/report
> /usr/pkg/bin/snortsnarf.pl -d /var/log/snort/report /var/log/snort/alert
> cd /var/log/snort/report
> firefox index.html
Note: if you don’t have an X11 desktop, just scp the report folder over to a host that does and run firefox index.html from that host.

NetBSD FIOS Gateway HOWTO

20 Wednesday Mar 2013

Posted by Slice2 in NetBSD

≈ Leave a comment

Tags

NetBSD

What you need:

1)     Get NetBSD

  1. This process works for NetBSD 5x and 6x. I’ve updated this doc for NetBSD 6.0.1.
  2. Download the ISO image from the site nearest you: http://www.netbsd.org/mirrors/#iso
  3. Note: your CPU architecture choice determines what version of NetBSD you use.  Regular 32 bit x86 hardware from AMD and Intel use the i386cd iso file. As you can see, NetBSD runs on just about everything, including toasters http://www.embeddedarm.com/software/arm-netbsd-toaster.php
  4. A computer with two NIC’s, two CAT5 network cables and switch for your internal network.
  5. An Internet connection. This doc is based on a DHCP connection to the external Verizon FIOS network.
  6. External network = DHCP internet connection from Verizon FIOS in-home router
  7. Internal network = Local static IP connection to internal home network

2)     Minimum hardware specs:

  1. Good enough – 200 Mhz with 256 Mb of RAM, 9 Gig or larger hard drive
  2. Fast: AMD Athlon or Pentium 4, 2 Gigs of RAM, 40 Gig hard drive
  3. Note that the above PC specs are very old. NetBSD is great for repurposing Mom’s old computer.
  4. The PC I used?  A Dell GX270, Intel P4, 2 Gigs RAM, 40 Gig disk drive, two 10/100/1000 NICs (1 Intel, 1 Dlink). You can find one on Ebay.com for under $100. Note that your NIC device IDs will differ based on hardware vendor. http://shop.ebay.com/?_from=R40&_trksid=p5197.m570.l1313&_nkw=Dell+GX270&_sacat=See-All-Categories
  5. Caffeinated drink of choice.

Layout of the System and Network

1)     The list below depicts the example network and PC that I used to make this work.

Internal network: 10.10.10.0/24, mask 255.255.255.0, gateway 10.10.10.1

Internal NIC device ID: wm0

Internal IP: 10.10.10.1

Hostname: gateway

External Network: Internet connection via FIOS DHCP connection from Actiontek router provided by Verizon.

External NIC device ID: sk0

External IP: provided by DHCP

Install NetBSD

1)     Install NetBSD on you system.  Just follow the prompts. It’s easy. When asked, install all of the X packages. If you can’t figure that out, don’t worry. Installing xfce later in this doc will take care of it.

2)     When done with the installation, log in as root and perform the following.

–> /usr/bin/passwd

Changing local password for root.

New password:

Retype new password:

–> useradd -m -G wheel <your new user name>

–> passwd <your new user name>

–> echo “sshd=YES” >> /etc/rc.conf

–> echo “inetd=NO” >> /etc/rc.conf

–> /etc/rc.d/sshd restart

Enable and configure Networking Services.

1)     Since you have two NICs, you have to manually define the NIC with the static IP for the internal network.

–> vi /etc/ifconfig.wm0 and add:

up

media autoselect

10.10.10.98 netmask 255.255.255.0 media autoselect  (use the IP you want to be your internal network interface)

–> wq!

Note: you will not create /etc/ifconfig.sk0 because it’s not static. You’ll get DHCP from FIOS.

2)     Enable packet forwarding/routing and performance tweaks.

–> vi /etc/sysctl.conf and add:

net.inet.ip.forwarding=1

net.inet.ip.mtudisc=1

net.inet.tcp.recvspace=65535

net.inet.tcp.sendspace=65535

–> wq!

3)     Since you get your public IP address assignment dynamically through DHCP, enable it in /etc/rc.conf.

–> vi /etc/rc.conf

dhclient=YES

dhclient_flags=sk0   (this is the NIC that attaches to the FIOS router)

–> wq!

4)     Edit /etc/dhclient.conf so the DHCP client can query the DHCP service.

–> vi /etc/dhclient.conf and add:

send host-name “gateway”;                    <=== Put your hostname here.

send dhcp-client-identifier “gateway”;      <=== Put your host identifier here. Usually same as hostname.

request subnet-mask, broadcast-address, routers, domain-name-servers;

timeout 30;

retry 60;

select-timeout 5;

script “/sbin/dhclient-script”;

lease {

interface “sk0”;                                    <=== put your FIOS facing NIC device here.

option host-name “gateway”;               <=== put your hostname here

option subnet-mask 255.255.255.0;

#  option domain-name “my.domain”;

#  option domain-name-servers 127.0.0.1;

renew 2 2000/1/12 00:00:01;

rebind 2 2000/1/12 00:00:01;

expire 2 2000/1/12 00:00:01;

}

–> wq!

5)     Prevent dhclient from nuking your /etc/resolv.conf.

–> vi /etc/dhclient-enter-hooks  (and paste in the lines below)

make_resolv_conf() {

echo “doing nothing to resolv.conf”

}

–> wq!

6)     Edit your IP Filter rules.

–> vi /etc/ipf.conf and add:

pass in from any to any

pass out from any to any

–> wq!

Note: for a more secure setup see http://www.netbsd.org/docs/network/nsps/config_ipf.html for advanced firewall filtering rules and options. You can also Google it. You could also install Webmin and use the Ipf module.

7)     Enter your Network Address Translation (NAT) rules for the NIC facing the FIOS router.

–> vi /etc/ipnat.conf and add:

map sk0 10.10.10.0/24 -> 0.0.0.0/32 proxy port ftp ftp/tcp

map sk0 10.10.10.0/24 -> 0.0.0.0/32 portmap tcp/udp 40000:60000

map sk0 10.10.10.0/24 -> 0.0.0.0/32

–> wq!

8)     Enable your NAT/firewall features and NTP for time sync.

–> vi /etc/rc.conf

ipfilter=YES      #Stateful firewall

ipnat=YES        #Network Address Translation

ipmon=YES      #Firewall logging

ntpdate=yes ntpdate_hosts=”0.pool.ntp.org”

ntpd=yes

–> wq!

–> reboot

9)     During the reboot it should discover its DHCP IP from the FIOS router. It will probably be 192.168.1.2, 3 or 4. If it doesn’t pick it up try switching the cables on the back of your PC to the other NIC and reboot. Also, if DHCP does not work, log in as root and try running the following:

–> dhclient sk0

Listening on BPF/sk0/1c:bd:b9:85:b9:03

Sending on   BPF/sk0/1c:bd:b9:85:b9:03

Sending on   Socket/fallback

DHCPDISCOVER on sk0 to 255.255.255.255 port 67 interval 7

DHCPDISCOVER on sk0 to 255.255.255.255 port 67 interval 13

DHCPOFFER from 192.168.1.1

DHCPREQUEST on sk0 to 255.255.255.255 port 67

DHCPACK from 192.168.1.1

doing nothing to resolv.conf

bound to 192.168.1.3 — renewal in 36425 seconds.

Watch your NAT table with:

–> ipmon -o N

To manually load the NAT rules if you make a change:

–> ipnat -CF -f /etc/ipnat.conf

10)  Add the NetBSD package location to the root profile.

For 5x:

export PKG_PATH=”http://ftp.NetBSD.org/pub/pkgsrc/packages/NetBSD/i386/5.1_2010Q3/All&#8221;

For 6x:

export PKG_PATH=”http://ftp.netbsd.org/pub/pkgsrc/packages/NetBSD/i386/6.0/All”

–> vi /root/.shrc

# Package location on the ftp server.

export PKG_PATH=”<your path from above, either 5x or 6x>”

export PKG_PATH

–> wq!

–> reboot

Login as root and install additional packages.

–> pkg_add -uv bash-4.2nb2
–> pkg_add -uv p5-Crypt-SSLeay
–> pkg_add -uv p5-Net-SSLeay
–> pkg_add -uv less-418
–> pkg_add -uv xfce4    (or xfce4-4.6.1nb5 if xfce4 doesn’t work)
–> pkg_add -uv firefox
–> pkg_add -uv nmap htop iftop lsof
–> reboot

Reboot to seat the changes.  Login as root and start the new GUI desktop.

–> bash
–> startxfce4

You now have a nice lightweight desktop, firefox and xterms. You are welcome.

11)  Setup your clients. Clients behind the NetBSD NAT/router should be configured for DNS resolution and the proper default gateway. Note that if you have internal DNS and possibly Active Directory running in your internal network and it’s forwarding to your external FIOS DNS servers, use your local DNS server in the steps below.  If not, you can use the FIOS DNS on your internal clients.

Follow Blog via Email

Enter your email address to follow this blog and receive notifications of new posts by email.

Recent Posts

  • Patch Alma Linux 8.7 on an Offline or Air-Gapped System
  • HOWTO Remove /home logical volume and add that space to the root partition
  • Patch Rocky Linux 8.6 on an Offline or Air-Gapped System
  • HOWTO Install the Splunk Universal Forwarder on FreeBSD
  • HOWTO install a Splunk Universal Forwarder on Solaris 11 SPARC and x64 Using pkg(p5p) and tar
  • HOWTO install a Splunk Universal Forwarder on Solaris 10 SPARC and x64 Using pkgadd and tar
  • Recover Files from a Windows NTFS partition using Linux based SystemRescue
  • Sysmon Event ID 1 Process Creation rules for Splunk Universal Forwarder and McAfee All Access
  • Upgrading CentOS 7.2003 to 7.2009 on an Offline or Air-Gapped System
  • HOWTO Easily Resize the Default LVM Volume on Ubuntu 18.04
  • Create a Docker Container for your Cisco ESA, SMA or WSA Offline Content Updates
  • Apply the Mozilla Firefox STIG to Firefox on Ubuntu Linux 18.04
  • Dynamically Resize Those Tiny BlackArch Linux Terminals and Add a Scrollbar
  • Kali Linux OVA for Air-Gapped Use Build Process
  • HOWTO install the XFCE 4 Desktop on NetBSD 8.1
  • Build a Kali Linux ISO with the latest OS patches and packages
  • HOWTO quickly STIG Firefox 59.01
  • HOWTO mount a Synology NAS SMB share on Linux with SMBv1 disabled
  • Howto safely delete the WSUS WID on Windows 2012R2
  • HOWTO quickly STIG Firefox 45.0.1
  • Completing the vSphere vCenter Appliance Hardening Process
  • HOWTO install the XFCE 4.12 Desktop on NetBSD 7
  • Enabling TLS 1.2 on the Splunk 6.2x Console and Forwarders using Openssl and self signed certs.
  • HOWTO enable SSH on a Cisco ASA running 9.1.x
  • Apply a Windows 2012 R2 Domain GPO to a standalone Windows 2012 R2 server
  • Enable legacy SSL and Java SSL support in your browser for those old, crusty websites
  • HOWTO update FreeBSD 10.1 to the latest 11-current release
  • HOWTO Secure iSCSI Luns Between FreeBSD 10.1 and NetApp Storage with Mutual CHAP
  • HOWTO install the XFCE 4 Desktop on NetBSD 6.1.5
  • HOWTO Secure iSCSI Luns Between Ubuntu Server 14.10 and NetApp Storage with Mutual CHAP

Categories

  • Cisco (2)
  • ESXi (4)
  • FreeBSD (2)
  • HP (5)
  • iSCSI (12)
  • Linux (31)
  • Nessus (3)
  • NetApp (31)
  • NetBSD (10)
  • Oracle (9)
  • Security (48)
  • Solaris (9)
  • Splunk (5)
  • VMware (19)
  • Windows (20)
  • Wireshark (4)
  • XFCE (3)

Archives

  • February 2023
  • August 2022
  • July 2022
  • April 2022
  • March 2022
  • February 2022
  • January 2022
  • November 2021
  • January 2021
  • December 2020
  • November 2020
  • August 2020
  • May 2020
  • September 2019
  • August 2019
  • March 2018
  • November 2016
  • March 2016
  • January 2016
  • November 2015
  • July 2015
  • June 2015
  • February 2015
  • January 2015
  • December 2014
  • November 2014
  • October 2014
  • September 2014
  • August 2014
  • July 2014
  • May 2014
  • April 2014
  • March 2014
  • February 2014
  • January 2014
  • December 2013
  • November 2013
  • October 2013
  • September 2013
  • August 2013
  • July 2013
  • June 2013
  • May 2013
  • April 2013
  • March 2013

Blogroll

  • Adobe Security Bulletins
  • CentOS Blog
  • Cisco Security Blog
  • CSO Magazine
  • DHS National Vulnerability Database
  • Eric Sloof's NTPRO
  • HT SSL Tests
  • Intel Corp Security Advisories
  • Internet Usage World Stats
  • Kali Linux Blog
  • Linux Mint Blog
  • Meltdown and Spectre
  • Microsoft Security Blog
  • Microsoft Security Intelligence Report
  • Microsoft Security Research & Defense
  • Microsoft Security Response Center
  • MITRE CVE Site
  • NetApp Blogs
  • NetBSD Blog
  • Oracle OTN Security
  • Oracle Security Blog
  • PacketStorm
  • Redhat Security Blog
  • SC Magazine
  • Shodan Search Engine
  • US-CERT Alerts
  • US-CERT Bulletins
  • US-CERT Vulnerability Notes KB
  • VMware Blogs
  • VMware Security Advisories

Category Cloud

Cisco ESXi FreeBSD HP iSCSI Linux Nessus NetApp NetBSD Oracle Security Solaris Splunk VMware Windows Wireshark XFCE

Follow Blog via Email

Enter your email address to follow this blog and receive notifications of new posts by email.

Join 38 other subscribers

Powered by WordPress.com.


Loading Comments...